


The Flare Tool is not a Live Effect, you cannot edit it through the Appearance Panel.
To edit a flare, select it with the Selection tool and double-click the Flare tool in the Toolbox, to opens the Flare Tool Options dialog, where you specify any changes to the appearance of the flare. When you check the Preview button you will be able to see the changes happening to the flare as you adjust the settings.


To create an Opacity Mask: I selected the top rectangle. Using the Transparency Panel or the Opacity pull down menu (on the control menu bar) clicked on the fly out menu to create an Opacity Mask.(F.). I Used the Flare tool in the Opacity Mask to create the effect.
 3. Using the flare Tool as a Symbol
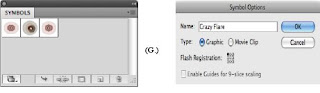
Create the Flare, select it using the Selection tool and drag and drop it to the Symbol Panel.
Give the symbol a name by double clicking on the symbol in the panel or by using the fly out menu in the Panel (G.). Use the Symbol tool to play with the Flare Symbol.
3. Using the flare Tool as a Symbol
Create the Flare, select it using the Selection tool and drag and drop it to the Symbol Panel.
Give the symbol a name by double clicking on the symbol in the panel or by using the fly out menu in the Panel (G.). Use the Symbol tool to play with the Flare Symbol.


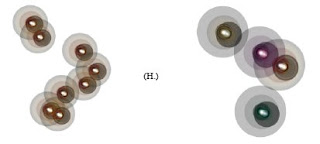
While using the Symbol tools, experiment with the Symbol Stainer tool and the Symbol Screener Tool to change the colors of the symbol and the Flare. (H.).
 Select the object with the selection tool and drag and drop to your brush panel to create a Scatter Brush. (J.)
 In the Brush options dialog you can change the method of the brush to None, Tint, Tint & shade, Hue Shift. Another way of changing colors of your Flare. (K.)
 5. Copy and paste as a Smart Object to Photoshop.
Another great way to change the Flare tool options, after drawing the Flare is using it in Photoshop as a Smart Object. Draw the Flare, keep it selected. Copy and paste it into a Photoshop document as a Smart Object. Double click on the Smart Object Icon to bring it back to Illustrator as a Vector Object.(L.) In Illustrator, Double Click on the Flare Icon to bring the Options Dialog Box to change the setting. Save and go back to Photoshop for new Results.
5. Copy and paste as a Smart Object to Photoshop.
Another great way to change the Flare tool options, after drawing the Flare is using it in Photoshop as a Smart Object. Draw the Flare, keep it selected. Copy and paste it into a Photoshop document as a Smart Object. Double click on the Smart Object Icon to bring it back to Illustrator as a Vector Object.(L.) In Illustrator, Double Click on the Flare Icon to bring the Options Dialog Box to change the setting. Save and go back to Photoshop for new Results.
 CREATE! EXPLORE! ENJOY!

4. Using the Flare tool as a Brush
Create a Flare. Select the object with the Selection tool. Go to Object> expand & Expand the Flare. Go to Object>Clipping Mask >Release. If you see changes in he design, double click on the object to isolate it and delete the unwanted lines to create the same design as the original one. (I.)


 CREATE! EXPLORE! ENJOY!
2 comments:
Cool!
The information you have posted is very useful. The sites you have referred was good. Thanks for sharing... adobe illustrator expert
Post a Comment